
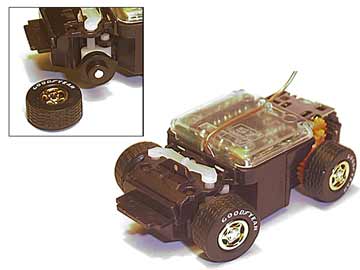
fig. 48
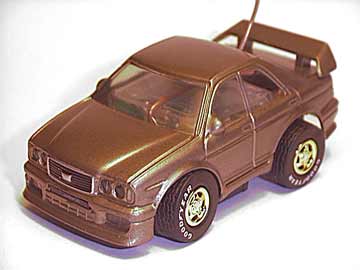
fig. 49
This mod uses high detail wide surface area treaded rubber tires. But the best part, is these wheels use adapters to mount the rims and tires. This allows for hot-swapping your rims and tires in seconds! Performance is outstanding! Total tire height stands slightly shorter than Tomy wheels, so they are compatible with all Bit bodies. This mod requires the "Johnny Lightning" series special edition die-cast toy cars. This series offers over 10 different types of wheels that I have seen, possibly more! The wheels come is all sorts of dimensions and styles. Some that I have seen include funny cars, 1950's white walls, hot rods, & Nascar wheels, all of which hotswap easily with the adapter! Although you can use the wheels of any hot wheel type car that fits, they may not have the hot-swap adapter feature.
First clip off the die cast car wheels with a wire cutter and set aside. Then begin by disassembling your front end. You will need to take apart your front steering knuckles. Details on how to do this can be found in Mod No. 19 (4 Wheel Drifting). Reassemble using the new wheels. Once you have completed mounting the new wheels, start disassembling your rear axles. To reconstruct into a new custom axle, you will need epoxy to secure the new wheels. Details outlining this step can be found in Mod No. 3 (Chassis Lowering). Essentially this mod is a combination of 3 & 19, but we are now using non-Tomy wheels.
Performance is impressive. The wider traction area allows for less spinout, and improved cornering. Downside is these wheels pickup fibers like a magnet. In one play, I have had to cut away hairs and fibers from the axle twice, because the tangle brought the gears to a stop. Detail is beautiful, and the gold finish is shinier and lighter than the aluminum rims available for the Bit.
22. Stand-alone Bit Charger
( For use with Multiple Cell Turbo Modified Bits )
This is a great mod that I first learned of from Bit hobbyist K.I.T.T. in the UK. This mod creates a stand alone charger to replace your controller charger. This mod has several advantages. Separating the charger function from your controller will extend your controllers battery life. Secondly, this mod is a better alternative to adequately charging Turbo Modified Bits because the charger on the controller will not charge Multiple Cell Bits without modification.
This mod is very inexpensive and simple. You can also select the charging voltage you wish to use, from 3v - 6v or higher, depending on the number of battery cells you use. (see fig. 50) Go to your nearest Radio Shack or electronics supply store, and pick up a battery case. For $1.69 you can get a 4 AA battery case project enclosure with an on/off slide switch built-in!
Start by removing the charging base plate from your controller, keeping the wires attached to the charging base plate. Solder the wires to the appropriate positive and negative lead wires from the battery case. Now your finished!
Please note that you no longer have the convenient timer function, so you will have to keep track of your charging time. If you plan to charge regular Bits, then you only need a 2 AA (3v) charger. If you have a Multiple Cell Turbo Bit, you will need a higher voltage than the total voltage of your combined battery cells in your car. For example, a normal Bit using a 1.2v cell requires 2 AA (3v total) to charge. So my portable charger uses 4 AA (6v) to charge my 2.4v Bit. (see fig. 51) Determining how long to charge your Multiple Cell Turbo Bits takes a bit of experimentation depending on your custom configuration.
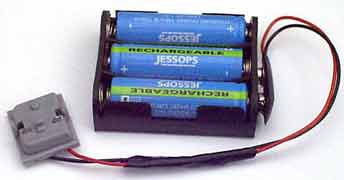
fig. 50 - K.I.T.T.'s "3" AA Bit Charger
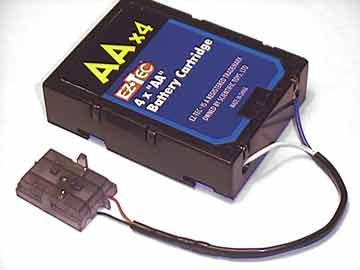
fig. 51 - "4" AA Bit Charger
fig. 52
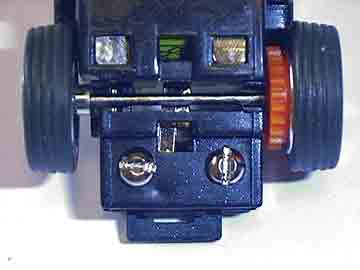
fig. 53
This modification optimizes and/or corrects poorly seated motors within the motor well, and improves both speed and torque by optimizing the distance between pinion and spur gears, thus reducing the resistance between the teeth. The symptoms of poor motor performance that this mod addresses include:
- Motor gets stuck whenever car comes to a stop.
- Excess tension betw pinion and spur gear (too tight)
- Poor contact between spur and pinion teeth (too loose)
- Motor doesn't run (poor terminal contact)
This mod requires two small machine or micro screws. Choose the shortest possible length screws so as not to interfere with ground clearance. Adjustment is very simple. Screw in both screws into the two portholes beneath the motor well. Do not screw in all the way, instead, screw in until the tip of the screws just barely touch the motorcase. Now begin to screw in either screw in 1/4 (quarter) turns.This gradual adjustment will raise, lower, tilt up, or tilt down the position of the motor within the well. Inserting the left screw deeper than the right raises the shaft side of the motor. Inserting the right screw deeper than the left raises the colored end of the motor and tilts the shaft-side downward. Adjusting both equally will raise or lower the motor depth. Adjust until you get the optimum spacing between the teeth of the pinion and spur gear, and/or best possible terminal contact. Note: The use of heavier screws may possibly help to create more traction by reducing spinout.
If this mod resolves your gear spacing, but not your terminal contacts, you can also try to adjust the terminals with a small slotted screwdriver. Raise the contact at the bottom of the motor well by bending it slightly upward. You can improve contact on the motors bell end by raising the contact "on the motor" to connect better with the contact on the side of the motor well.
 24.
Custom Tires
24.
Custom Tires
This simple mod uses both non-Tomy tires and self-fabricated tires. The best material for self-fabricated tires is to find mechanical or ergonomic pens with rubber grip. Thicker pens with wider diameters work much better.
Slide off the rubber grip and cut to size with an exacto hobby knife. There are dozens of grip designs that make for great tread patterns. The colors are also quite varied. As you can see in the pictures to the right, some pens fit the front rim size perfectly while other diameters are more suited for the rear rims. (See fig. 54)
You can also use non-Tomy or OEM type tires. The tires pictured in fig. 55 are "front wheel only" hard compound DirtCross Knobby tires (comparable to Hard S-02 tire consistency). These tires are available in our online store.
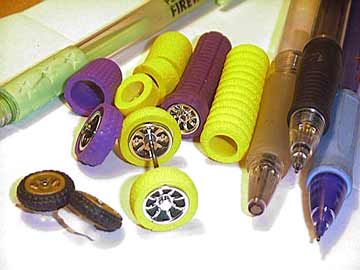
fig. 54
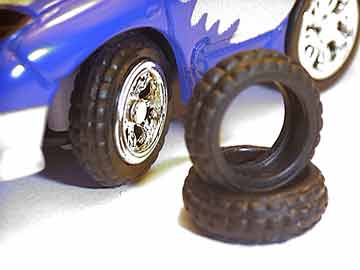
fig. 55