
fig. 17
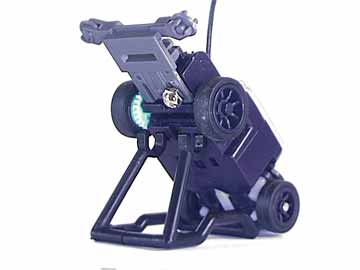
fig. 18
( Bit Racer Guide Bumper )
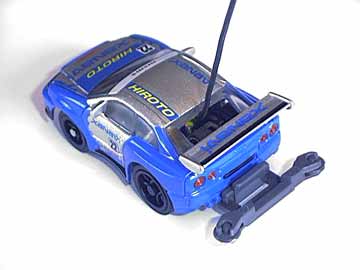
This mod uses the Bit Racer slot track guide bumper as a Tailskid or Wheelie bar. (See fig. 17). All that is necessary is a BitRacer slot track bumper, a washer, and a tiny machine screw.
Beneath the BitChar-g motor well are two holes. Align the bumper over the holes and secure in place using a machine screw and washer. (See fig. 18). Use a drill to create a larger opening in the bumper for the machine screw. There are several models of slot track bumpers, and not all fit. Also, not all bodies accomodate a rear bumper either.
The tailskid wheelie bar can be used to secure a penny, for a wheelie weight, like the original Choro-Q's. Or you can use it to secure a second battery for dual-cell drag BitChar-Gs.
Adding a Telescopic Antenna
This mod adds a telescopic antenna to your controller for additional range, without affecting or removing the original stock antenna. (See fig. 19). This mod requires a suitable telescopic antenna, copper wires, solder, and a soldering gun. You can buy the one we used here.
Open up your controller and find a suitable location to attach your telescopic antenna. Once you have figured out how to securely attach your antenna, measure the required distance from your antenna base to the blue wire that connects your original antenna to the circuit board. Solder a connection between your new antenna and the thin chrome metal plate that the blue wire is soldered to as well. Thats it! The hardest part is securing the new antenna, which may be easy or difficult depending on what type of antenna you get. I secured my antenna using the existing screw holes to avoid drilling any new ones, but I did have to do just a little cutting on the controller case. Click the following pictures to see exactly how we chose to mount our antennas: ( pic1 / pic2 ).
This modification gave me a modest 3' boost in stutter-free range (6' if you hold the controller over your head). The difference is evident when I switch back and forth between antennas. However, my telescopic antenna is only 17.5 inches long when fully extended, which isn't much longer than the stock wire one. Im sure a longer one will achieve better results *snickering*. However, in combination with the Cripple Capacitor Mod (No.6) and the Car Antenna Upgrade Mod (No. 5), I have been able to achieve a total gain of 18' of additional range on my Xanavi SE, whose original range was a paltry 5' radius.
An added benefit to this modification, is competition racing. If a race doesnt allow modified controllers, then you can simply and quickly retract the telescopic antenna, and then proceed to pull out the original wire one! (See fig. 19 - Inset). Please note that using both together doesnt improve range.
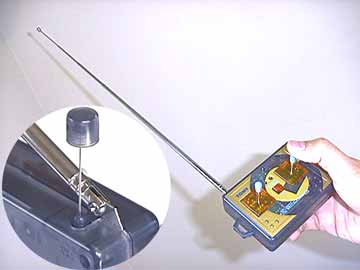
fig. 19
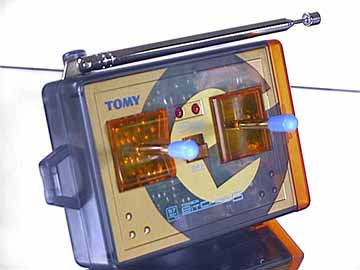
fig. 20
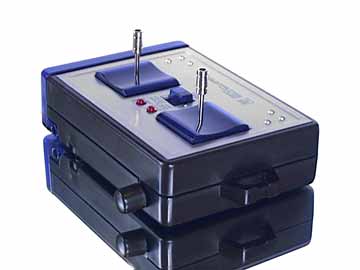
fig. 21
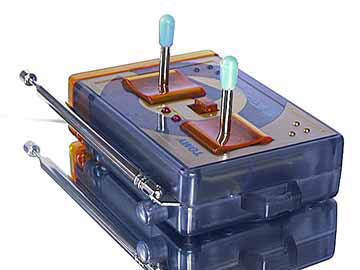
fig. 22
This mod allows for easier play, by incorporating toggle type joysticks into your controller buttons. This mod requires a drill, machine screws and toggles type joysticks.
Tomy controllers are very small, and become uncomfortable after extended play. By adding joysticks, the controller can be held with a looser, more comfortable ergonomic grip. Also, tactile feel is better because of the leverage and the travel on the joystick when playing. Begin by unassembling your controller, and remove your buttons. Drill small holes in the center of the buttons, to the appropriate size necessary for your joysticks. Secure it, and reassemble the controller!
Here are two examples of my customized controllers. I am especially proud of the gold and orange one, becuase the to rubber joystick grips match the color of the Tomy logo in the middle!
( Steering Return Spring )
This is a simple but almost necessary modification especially if you open up your steering assembly often. All you need is a soldering iron, or a candle and a philips screwdriver.
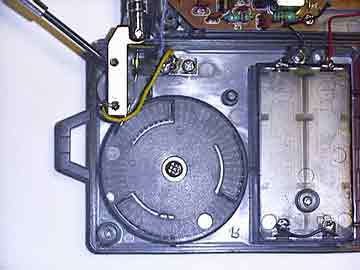
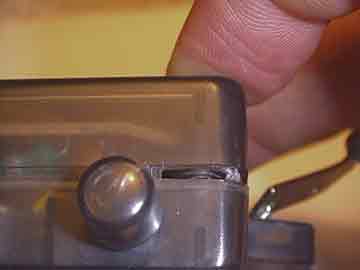
Open up your bit and take apart your steering assembly. On top of your steering magnet, you will see a small thin spring seated on a little black pin. this is your "centering spring" or "steering return spring". (See fig. 23). This little spring is absolutely necessary to your cars normal opeartion. Beacause it is seated on the steering magnet, it has a tendency to fly off when the steering magnet pops out. This is easily solved by taking a soldering iron or heated screwdriver and lightly melting the top of the plastic pin. (See fig. 24). Viola! Your spring is secure. Alternatively, you can also use a glue gun to apply a small dab of glue to the top of the plastic pin. Thanks to B_drift for pointing out this suttle detail when reviewing the OEM Bullits and the Smart Cars.
For great tips on how-to disassemble the the front end, visit ausmicro.com.
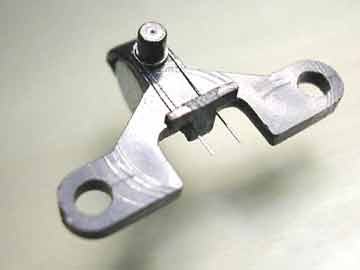
fig. 23
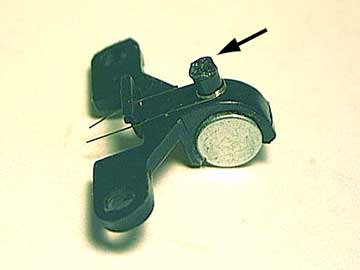
fig. 24