
07-15-2004, 09:33 PM
|
|
TinyRC Newbie
|
|
Join Date: Jun 2004
Posts: 17
|
|
 Better SE speed
hello ppl. ive seen a similar post like this but it didnt help much since my knuckles were in TERRIBLE condition. anyways my SE became super slow. the red gears and purple motor used to make it fly. i could use it on low pile carpet with ease. then without me knowing, the carpet fibers became stuck between the pin and the plastic of the knuckle. i was able to take some of the fibers out with tweasers as instructed from a previous post. but its so tight in there, no space to move with my large tweasers.
what i did was knock out the pin. it took forever. what i used was a screw dirver for tiny screws, kinda like the ones in the SE's. i found some crappy wood in my basement with a small hole. the hole was small enough so that the knuckle wouldnt fall through but so that the pin would. i hammered the pin out with the help of the screw driver.
the fibers were wound soooooo tight around the pin that the wheel couldnt spin freely on its own. i put the pin back but with a slightly larger gap than before. now it spins much better when i flick it. there was so much fiber that it was dragging the rest of the car.
now its really fast again. i almost gave up and bought a new one. i got so frustrated because i had tried everything. i thought my car had just gone bad. i spent hours of testing the different motors and gears. the best i got was the purple motor and the blue gears with the carpet fiber. now the car flies with the red gears. but to my suprise the blue gears and the purple motor still own.
anywho. for those of u who knew all this already sorry.
those who didnt. i hope this helps.

|
08-09-2004, 01:25 AM
|
 |
I process, therefore I am
|
|
Join Date: Nov 2002
Location: Savannah, GA USA
Posts: 1,075
|
|
Quote:
|
anyone have tips on preventions?
|
None I know of except only running the cars on clean hard surfaces. I sweep the linoleum before running or run them on a clean track. Sometimes I goof around with them on the coffee table. But, never on anything fuzzy. The only way I know to avoid fibers and hair is to never run the car in those conditions.
__________________
If it ain't broke, tear it apart and see what makes it tick!
|
08-09-2004, 11:41 PM
|
|
Wannabe TinyRC Pro
|
|
Join Date: Jun 2003
Location: Austin/Houston, TX
Posts: 120
|
|
|
when driving on carpet i also found that the fibers accumulate(sp) around the motor shaft between the housing and the pinion gear. i kept going through motors wondering why they would get so slow after a few runs and finialy picked up on that...
|
08-10-2004, 02:00 PM
|
|
I process, therefore I am
|
|
Join Date: Nov 2002
Location: Savannah, GA USA
Posts: 1,075
|
|
|
The best way to remove the new "reversed" front pins on the SEs is to completely dismantle the front end. Take the wheels with the knuckles still connected and carefully pry the knuckle away from the wheel at the back just far enough to get some play between the wheel and knuckle. Use a small jewelers screwdriver or some similar small device to pry with. Grab the head of the pin from the back with pliers and slowly pull the pin free of the wheel. Be careful here as these parts are very tiny and fragile. Clean out the corruption and reassemble.
__________________
If it ain't broke, tear it apart and see what makes it tick!
|
08-10-2004, 07:43 PM
|
|
I process, therefore I am
|
|
Join Date: Nov 2002
Location: Savannah, GA USA
Posts: 1,075
|
|
Quote:
|
Do they press back together securely?
|
Yup.
Quote:
|
Is this something you don't want to do too many times?
|
Yes, the parts are plastic and maliable and will wear quickly. It's hard to do period without at least knicking the wheel or knuckle in the prying process. Just go real slow and careful.
__________________
If it ain't broke, tear it apart and see what makes it tick!
|
08-10-2004, 08:14 PM
|
|
TinyRC Newbie
|
|
Join Date: Jun 2004
Posts: 17
|
|
here is what i use to hammer the pin out. all i did was cut off the end of one of my screw drivers. it then leaves a nub. leave it so its only long enough to push the pin out. too long and it will bend when u start to hammer. too short and it wont push the pin out enough.
btw, i found out that there are new pins out there as many of you already know. both of my SE's have the old pins so i dont know how to remove the newer ones.
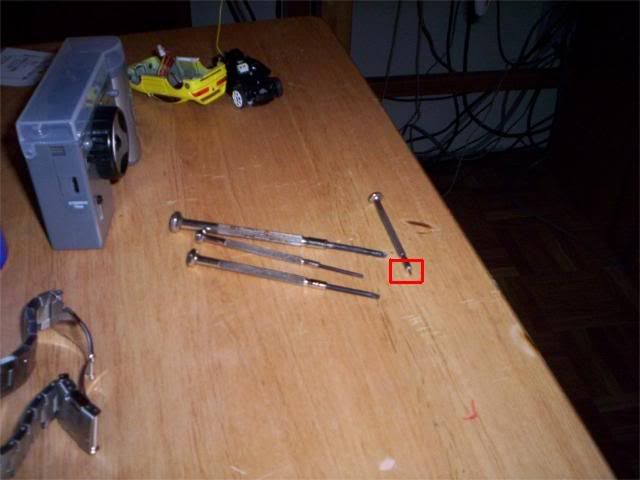
=============
this is what it looks like once off the chassis
u must push out the metal that u see in the middle there
sorry for the bad pix 
===========
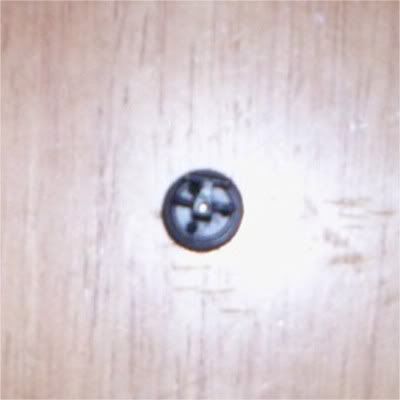
heres what it looks like when its apart
u get these 3 parts. its easy to put back together. take the wheel, then that other part (whatever its called) then the pin. just stick them together in that order. actually stick the pin into the rim so that when u put the whole thing back, the pins pointy part is pointing towards the chassis. i hope that makes sense. the head of the pin will face outwards like the other ones
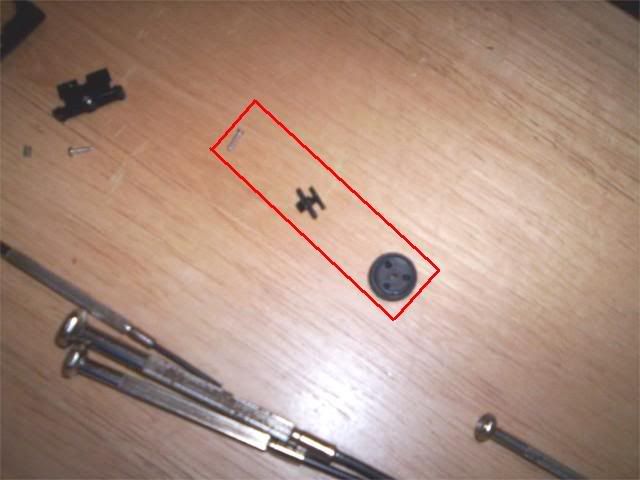
dont squeeze everything back together so tight. leave more room than usual. last longer before the next cleaning
Last edited by LightFetish; 08-10-2004 at 09:05 PM.
|
08-11-2004, 04:29 PM
|
|
I process, therefore I am
|
|
Join Date: Nov 2002
Location: Savannah, GA USA
Posts: 1,075
|
|
|
No. The pin spins freely and is press fitted into the wheel. The lug is part of the wheel. It's the oppisite of the original configuratiion. Originally, the pin was press fitted into the knuckle from the outside through a free spinning wheel. Now, the pin press fits into the wheel and the pin spinns freely in the knuckle. Your diagram is correct, just remember that the pin anchors into the wheel now.
__________________
If it ain't broke, tear it apart and see what makes it tick!
|
08-12-2004, 12:37 AM
|
|
I process, therefore I am
|
|
Join Date: Nov 2002
Location: Savannah, GA USA
Posts: 1,075
|
|
Exactly! And, I agree with your assumption about the older version being tougher to remove. I was thinking this may well be why they changed them. Specifically, to make wheel swapping easier for modders. Maybe, if RS has it's head screwed on right, they will release special wheel kits with a tiny tool for removing the fronts easier. Nah, never happen  .
__________________
If it ain't broke, tear it apart and see what makes it tick!
|
09-05-2004, 06:43 AM
|
|
TinyRC Newbie
|
|
Join Date: Aug 2004
Location: netherlands
Posts: 10
|
|
|
how can i remove the cap on the older design ,
i have tried it with a sharp object but it didn't worked
|
09-05-2004, 08:59 AM
|
|
I process, therefore I am
|
|
Join Date: Nov 2002
Location: Savannah, GA USA
Posts: 1,075
|
|
Quote:
|
how can i remove the cap on the older design
|
If you mean how do you remove the pin that holds the front wheels on the older Zips, there are loads of strings on this all over the place. Do a search on removing the front wheels.
__________________
If it ain't broke, tear it apart and see what makes it tick!
|
09-05-2004, 02:16 PM
|
|
|
|
great thread.
thanks, pics make alot of help.
|
01-02-2006, 07:40 PM
|
|
TinyRC Newbie
|
|
Join Date: Jan 2006
Posts: 2
|
|
Hey y'all - new here... Been trying to disassemble the front wheel backing plate from the steering knuckle on an SE, and can't figure out how to pull the pin out without feeling like I am going to destroy the entire assembly or break off one of the pinions...
Anyone have a miracle solution?

|
01-03-2006, 08:40 AM
|
 |
TinyRC Pro
|
|
Join Date: Jan 2003
Posts: 25
|
|
|
Hmm.. maybe you could use an exacto knife blade to pry out the pin just enough to get flat blade screwdriver under the pin head.
__________________
peace.
zach
|
01-03-2006, 09:51 AM
|
|
TinyRC Newbie
|
|
Join Date: Jan 2006
Posts: 2
|
|
|
Nope - tried that and busted off the tip of a brand new exacto and then chipped a brand new jeweler's screwdriver. :-(
I found a good solution though - using the longest and very thinnest exacto blade, I was able to slice between the backing place and the steering knuckle and remove 85% of the junk. I could not believe the size of the hairball I finally extracted (compressed down it was about 3-5mm in diameter!). Steering function is restored, but quite not like new...
|
01-03-2006, 10:34 AM
|
|
TinyRC Pro
|
|
Join Date: Jan 2003
Posts: 25
|
|
What about a blade with a rounded end? That was the type of blade I had in mind...

__________________
peace.
zach
|
 Posting Rules
|
You may not post new threads
You may not post replies
You may not post attachments
You may not edit your posts
HTML code is Off
|
|
|
All times are GMT -5. The time now is 03:07 PM.
|
|


 Linear Mode

